20
2 Knowing the Parts
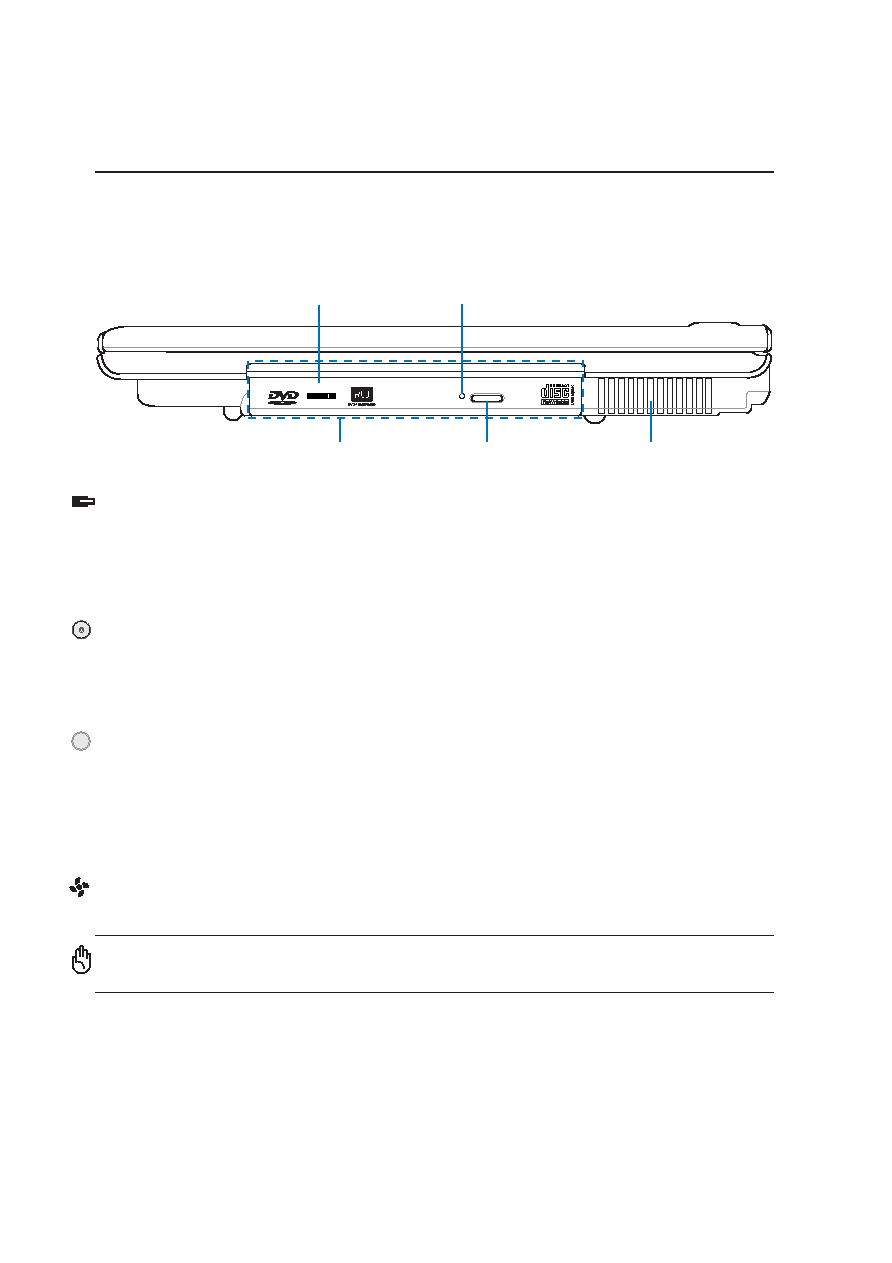
Right Side
Refer to the diagram below to identify the components on this side of the Notebook PC.
Electronic Eject, Emergency Eject
The optical drive eject has an electronic eject button for opening the tray. You can also eject the optical
drive tray through any software player or by right clicking the optical drive in Windows™ “My Com-
puter.” The emergency eject is used to eject the optical drive tray in case the electronic eject does not
work. Do not use the emergency eject in place of the electronic eject. The activity LED (not available
on some models) lights in proportion to the data transferred between the Notebook PC and optical disc.
Optical Drive (Device Module)
The Notebook PC comes in various models with different optical drives. The Notebook PC’s optical
drive may support compact discs (CD) and/or digital video discs (DVD) and may have recordable (R)
or re-writable (RW) capabilities. See the marketing specifications for details on each model.
Module Bay
The Notebook PC features a swappable drive bay which can utilize different options designed for this
Notebook PC. The Notebook PC must be turned OFF when swapping modules. Hold the spring-loaded
latch on the bottom in order to pull out the module. Insert and lock the module by pressing the side
closer to the front of the Notebook PC.
RECORDER
Emergency
Eject
Electronic
Eject
Module Bay
Cooling Fan
and Air Vents
Optical Drive
(Device module varies by model)
Air Vents
The air vents allow cool air to enter and warm air to exit the Notebook PC.
IMPORTANT! Make sure that paper, books, clothing, cables, or other objects do not
block any of the air vents or else overheating of the Notebook PC may occur.