48
4 Using the Notebook PC
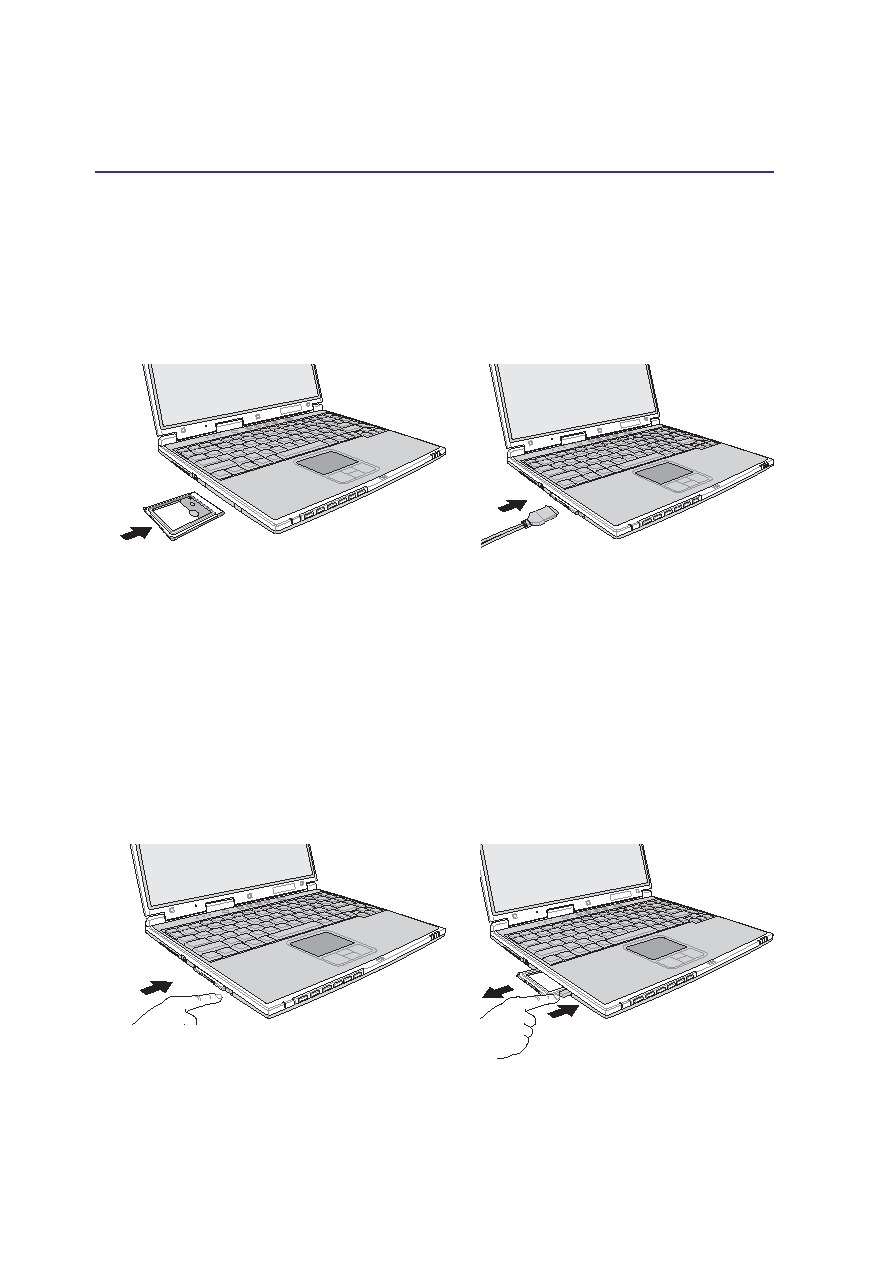
Inserting a PC Card (PCMCIA)
1. Insert the PC card with the connector side first.
When the PC card is fully inserted, the PC card
bay door can close normally without striking
the PC card.
2. Carefully connect any cables or adapters
needed by the PC card. Usually connectors
can only be inserted in one orientation. Look
for a sticker, icon, or marking on one side of
the connector representing the top side.
1. Press in the toggle eject button and release. The
recessed spring loaded toggle button will ex-
tend when pushed in and released.
2. Press the extended button again to eject the
PC Card. Carefully pull the ejected PC card
out of the socket.
Removing a PC Card (PCMCIA)
To remove the PC card, first remove all cables or adapters attached to the PC card, then double-click the
PC card icon on the Windows taskbar and stop the PC card you want to remove.
Be sure the PC card is
level when inserting.
INSERT
THIS
END