18
2. Knowing the Parts
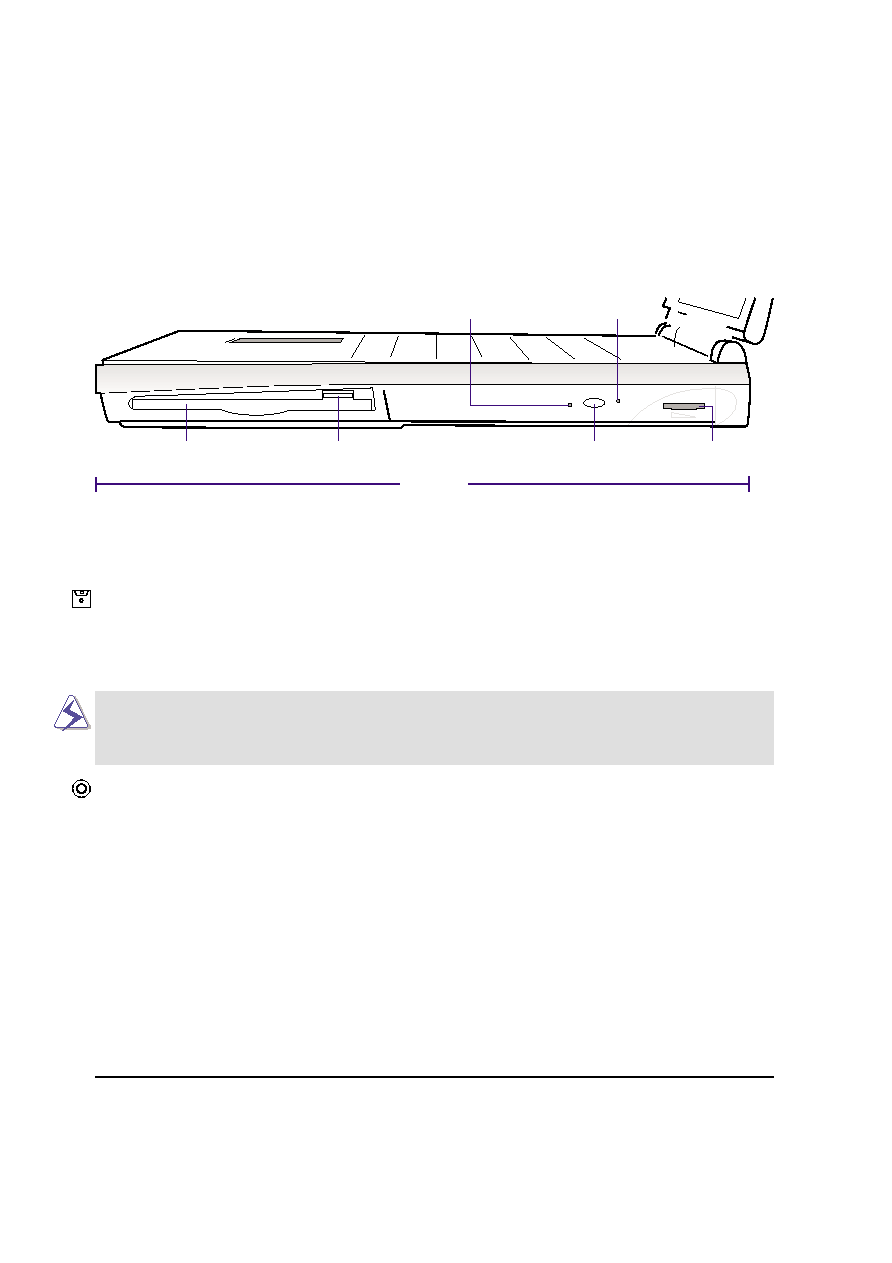
Right Side
Refer to the diagram below to identify the components on the right side of the Notebook PC.
The following describes the components on the right side of the Notebook PC as shown by the illustra-
tion above.
Floppy Disk Drive and Floppy Eject
This is a standard 1.44MB floppy disk drive with Japanese 3-mode floppy support. Floppy disk activity
should be seen through the activity LED next to the power button. Unlike desktop PC floppy disk
drives, the eject button of the Notebook PC is on top of the opening to allow easy floppy ejection from
the top.
WARNING! The floppy disk drive’s eject button protrudes out of the Notebook PC
when a floppy disk is fully inserted and can be easily damaged if struck. Eject the
floppy disk before transporting the Notebook PC.
CD/DVD-ROM Drive
The Notebook PC comes in a 24X CD-ROM model or a 6X DVD-ROM model (the DVD-ROM is also
capable of reading CDs at 24X).
CD/DVD-ROM Activity LED
The activity LED blinks proportionally to the CD/DVD-ROM drive activity and also blinks when
electronically ejecting a CD/DVD.
CD/DVD-ROM Eject and Emergency Eject
The CD/DVD-ROM eject is an electronic eject button for opening the tray. You can also eject the CD/
DVD through the software CD/DVD player or by right clicking the CD/DVD drive in Windows™ “My
Computer.” The emergency eject is used to eject a CD/DVD in case the electronic eject does not work.
Do not use this in place of the electronic eject.
Floppy Eject
Floppy Disk Drive
CD/DVD Eject
Volume Control
CD/DVD
Activity LED
CD/DVD
Emergency Eject
256mm