Chapter 9. Configuring Firewall/NAT Settings
Internet Security Router User
’s Manual
74
Field
Description
IP Address
Enter the IP Address.
9.7.2.2
Access IP Pool Configuration Page
– (Firewall è Policy List è IP Pool)
Log into Configuration Manager as admin, click the Firewall menu, click the Policy List submenu and then
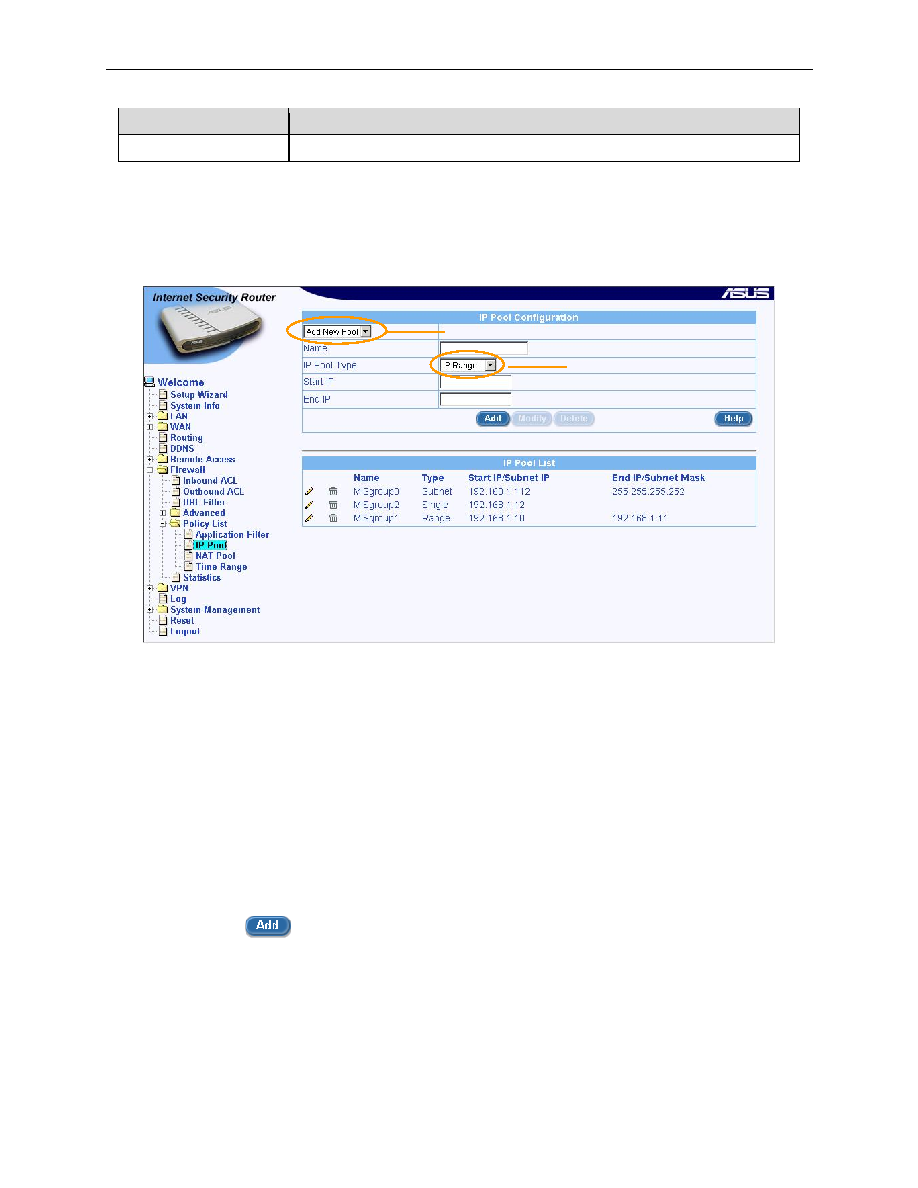
click the IP Pool submenu. The IP Pool Configuration page displays, as shown in Figure 9.25.
Note that when you open the IP Pool Configuration page, a list of existing IP pools is also displayed at the
bottom half of the configuration page such as those shown in Figure 9.25.
Figure 9.25 IP Pool Configuration Page
9.7.2.3
Add an IP Pool
To add an IP Pool, follow the instructions below:
1.
Open the IP Pool Configuration page (see section 9.7.2.2 Access IP Pool Configuration Page
–
(Firewall
è Policy List è IP Pool)).
2.
Select
“Add New Pool” from the IP Pool drop-down list.
3.
Enter a pool name into the Name field.
4.
Select a pool type from the IP Pool Type drop-down list.
5.
If
“IP Range” pool type is selected, enter start IP address and end IP address. If “Subnet” pool
type is selected, enter subnet address and subnet mask. If
“IP Address” pool type is selected,
enter an IP adderss.
6.
Click on the
button to create the new IP Pool. The new IP Pool will then be displayed in
the IP Pool list table.
9.7.2.4
Modify an IP Pool
To modify an IP Pool, follow the instructions below:
1.
Open the IP Pool Configuration page (see section 9.7.2.2 Access IP Pool Configuration Page
–
(Firewall
è Policy List è IP Pool)).
IP Pool drop-down list
IP Pool Type drop-down list