Chapter 9. Configuring Firewall/NAT Settings
Internet Security Router User
’s Manual
52
Field
Description
associate with an inbound ACL rule.
Time Ranges
Select a pre-configured time range during which the rule is active. Select
“Always” to make the rule
active at all times.
Application Filtering
This option allows you to select pre-configured FTP, HTTP, RPC and/or SMTP application filters
from the drop-down list.
Log
Click on the
“Enable” or “Disable” radio button to enable or disable logging for this ACL rule.
VPN
Click on the
“Enable” radio button if you want the traffic to go through VPN; otherwise, click on the
“Disable” radio button.
9.3.2
Access Inbound ACL Rule Configuration Page
– (Firewall è Inbound ACL)
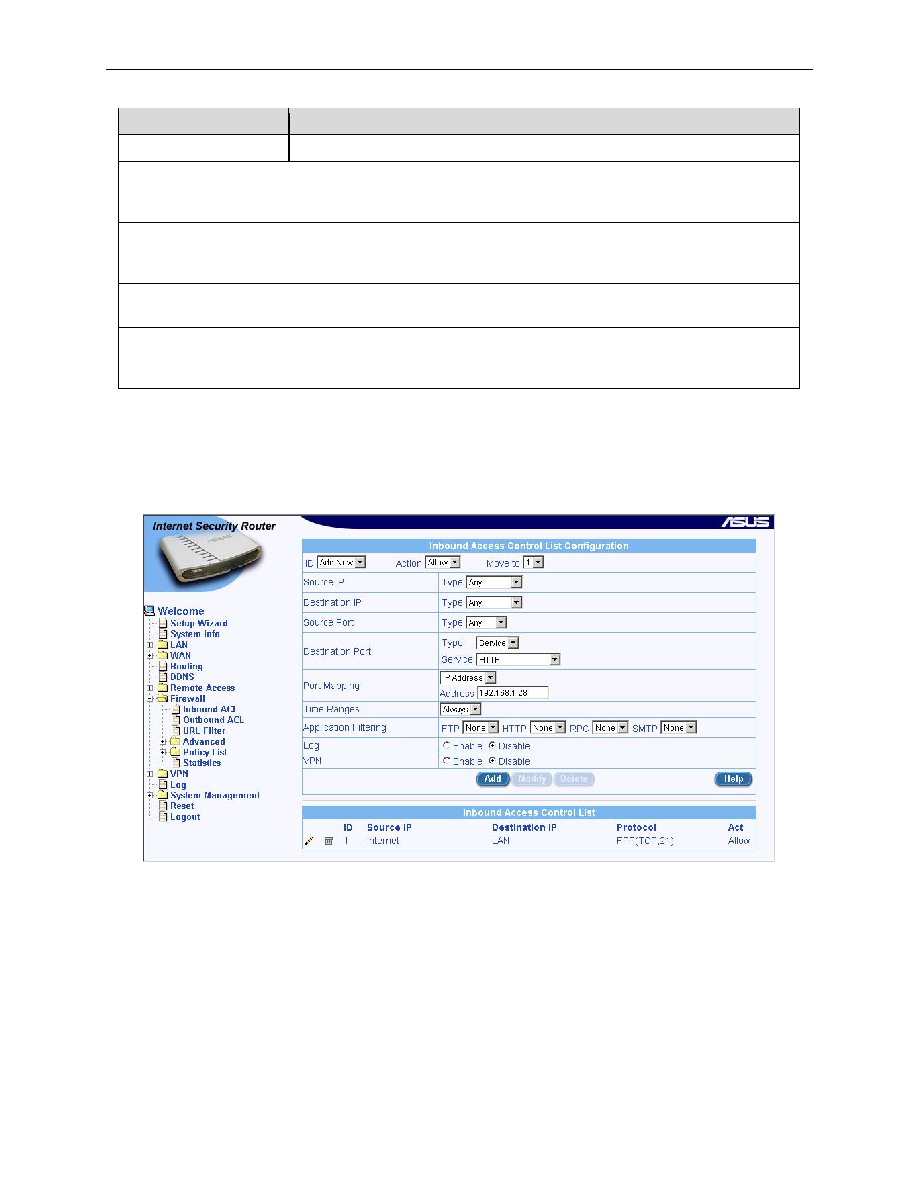
Log into Configuration Manager as admin, click the Firewall menu, and then click the Inbound ACL submenu.
The Firewall Inbound ACL Configuration page displays, as shown in Figure 9.7.
Note that when you open the Inbound ACL Configuration page, a list of existing ACL rules is also displayed at
the bottom half of the configuration page such as those shown in Figure 9.8.
Figure 9.8. Inbound ACL configuration example
9.3.3
Add Inbound ACL Rules
To add an inbound ACL rule, follow the instructions below:
1.
Open the Outbound ACL Rule Configuration Page (see section 9.3.2 Access Inbound ACL Rule
Configuration Page).
2.
Select
“Add New” from the “ID” drop-down list.
3.
Set desired action (Allow or Deny) from the
“Action” drop-down list.