Chapter 8. Configuring DDNS
Internet Security Router User
’s Manual
44
4.
In the DDNS Configuration page, select
“Enable” for the DDNS State and “RFC-2136 DDNS” for
the DDNS Type. The RFC-2136 DDNS Configuration page is then displayed as shown in Figure
8.3.
5.
Enter the domain name in the DNS Zone Name field.
6.
There is no need to change the settings for the primary and secondary DNS servers as they are
inherited from the settings in the WAN configuration page. Unless you want to change these
settings for WAN, leave them as they are.
7.
Click on
button to send a DNS update request to the DNS server(s) as specified in the
Primary DNS and Secondary DNS fields. Note that DNS update request will also be sent to the
DNS Server automatically whenever the WAN port status is changed.
8.4
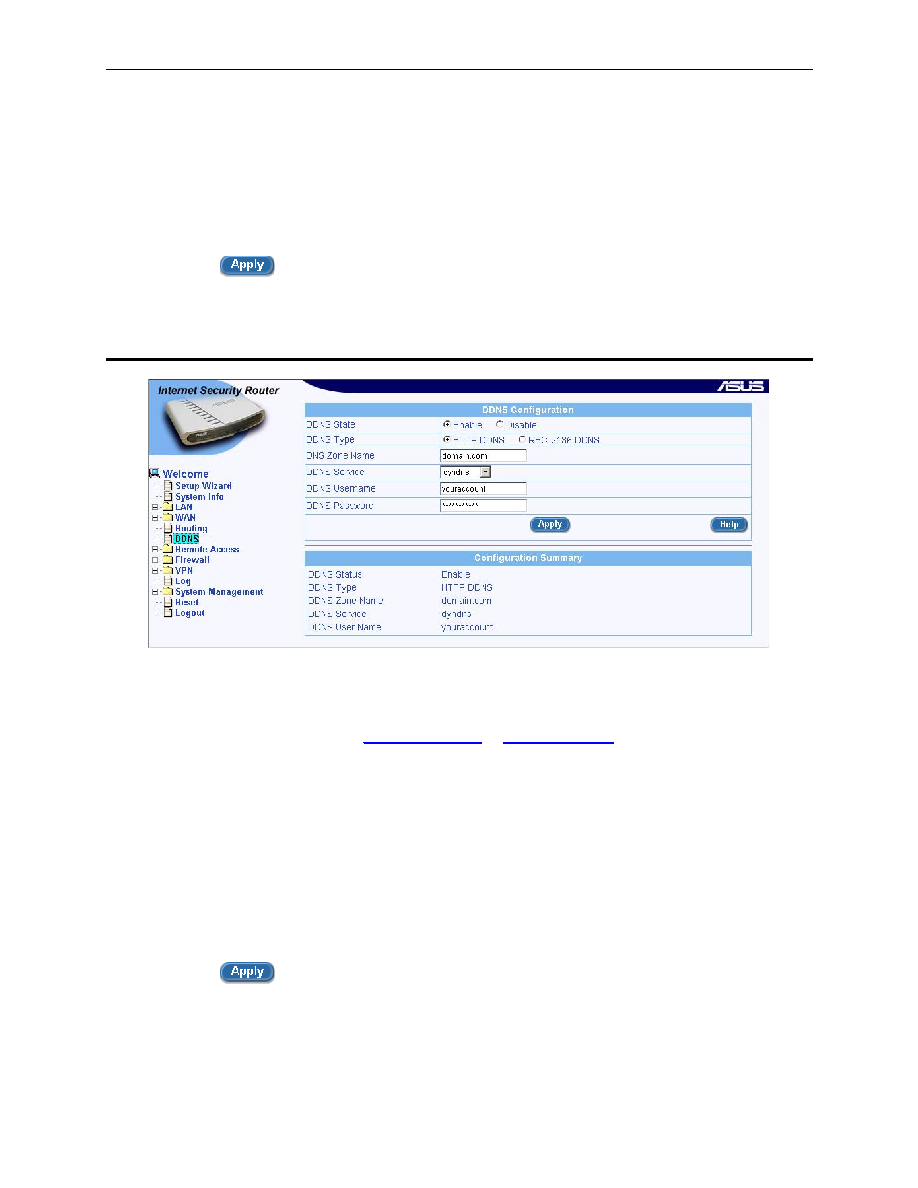
Configuring HTTP DDNS Client
Figure 8.4. HTTP DDNS Configuration Page
Follow these instructions to configure the HTTP DDNS:
1.
First, you should have already registered a domain name to the DDNS service provider. If you
2.
Make sure that you have a host name configured for the Internet Security Router; otherwise, go
to the System Information Configuration page (System Management
è System Identity) to
configure one.
3.
Open the DDNS Configuration page (see section 8.2 Access DDNS Configuration Page).
4.
In the DDNS Configuration page, select
“Enable” for the DDNS State and “HTTP DDNS” for the
DDNS Type. The HTTP DDNS Configuration is then displayed as shown in Figure 8.4.
5.
Enter the domain name in the DNS Zone Name field.
6.
Select a DDNS service from the DDNS Service drop-down list.
7.
Enter the username and password provided by your DDNS service providers.
8.
Click on
button to send a DNS update request to your DDNS service provider. Note that
DNS update request will also be sent to your DDNS Service provider automatically whenever the
WAN port status is changed.