Internet Security Router User
’s Manual
Chapter 10. Configuring VPN
91
10.3.1 Add a Rule for VPN Connection Using Pre-shared Key
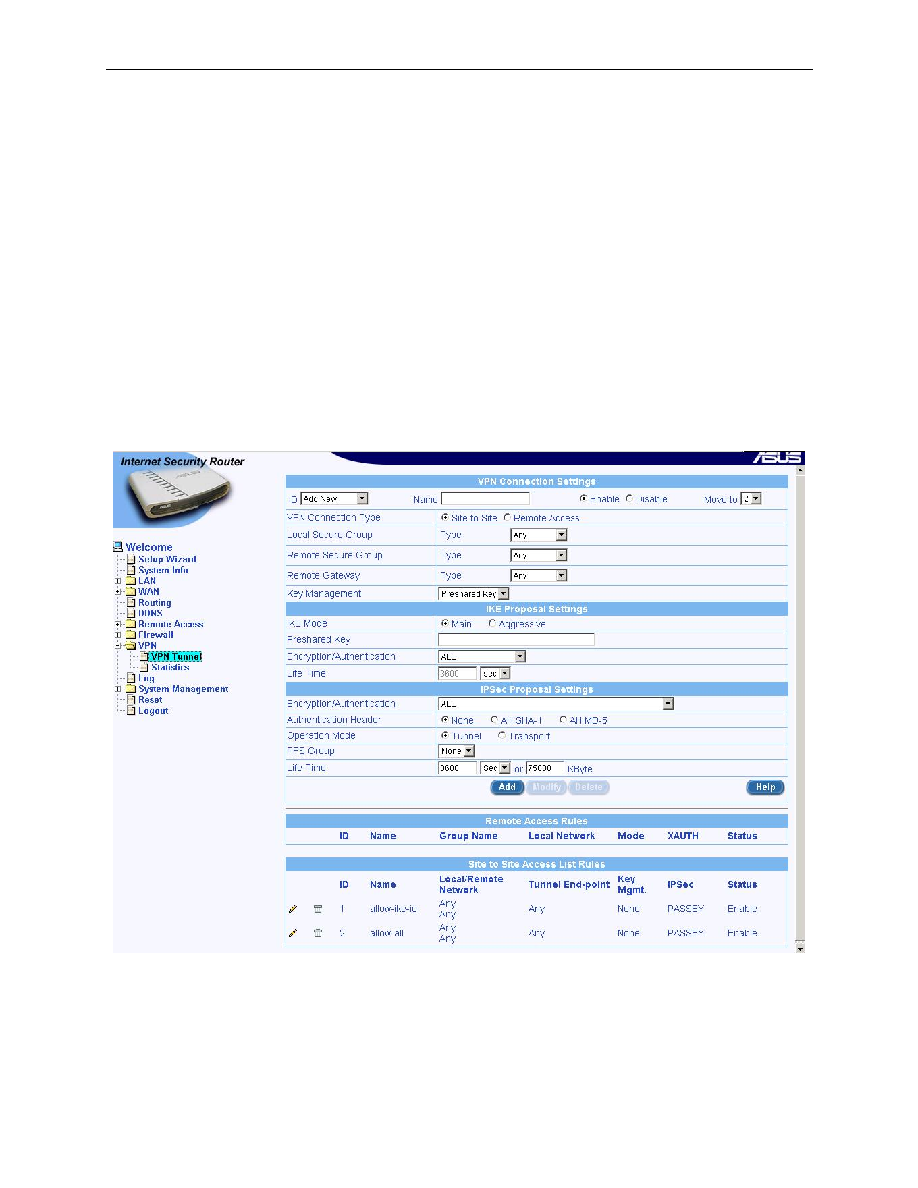
VPN Tunnel Configuration Page, as illustrated in the Figure 10.1, is used to configure a rule for VPN
connection using pre-shared key
To add a rule for a VPN connection, follow the instructions below:
1.
Log into Configuration Manager as admin, click the VPN menu, and then click the VPN Tunnel
submenu. The VPN Tunnel Configuration page displays, as shown in Figure 10.1.
Note that when you open the VPN Tunnel Configuration page, a list of existing rules for VPN
connections are also displayed at the bottom half of the configuration page such as those shown in
Figure 10.1.
2.
Prior to adding a VPN rule, make sure that the VPN service is enabled in System Service
Configuration page.
3.
Select
“Add New” from the “ID” drop-down list.
4.
Enter a desired name, preferably a meaningful name that signifies the nature of the VPN
connection, in the
“Name” field. Note that only alphanumeric characters are allowed in a name.
5.
Click on
“Enable” or “Disable” radio button to enable or disable this rule.
Figure 10.1. VPN Tunnel Configuration Page
– Pre-shared Key Mode
6.
Make changes to any or all of the following fields: local/remote secure group, remote gateway,
key management type (select Preshared Key), pre-shared key for IKE, encryption/authentication
algorithm for IKE, lifetime for IKE, encryption/authentication algorithm for IPSec, operation mode
for IPSec, PFS group for IPSec and lifetime for IPSec. Please see Table 10.4 for explanation of
these fields.