Chapter 2: Hardware setup
2-48
2.10.5 Front I/O board
You need to remove the front panel assembly before you can remove
the front I/O board. Refer to section “2.5.1 Removing the front panel
assembly” for instructions.
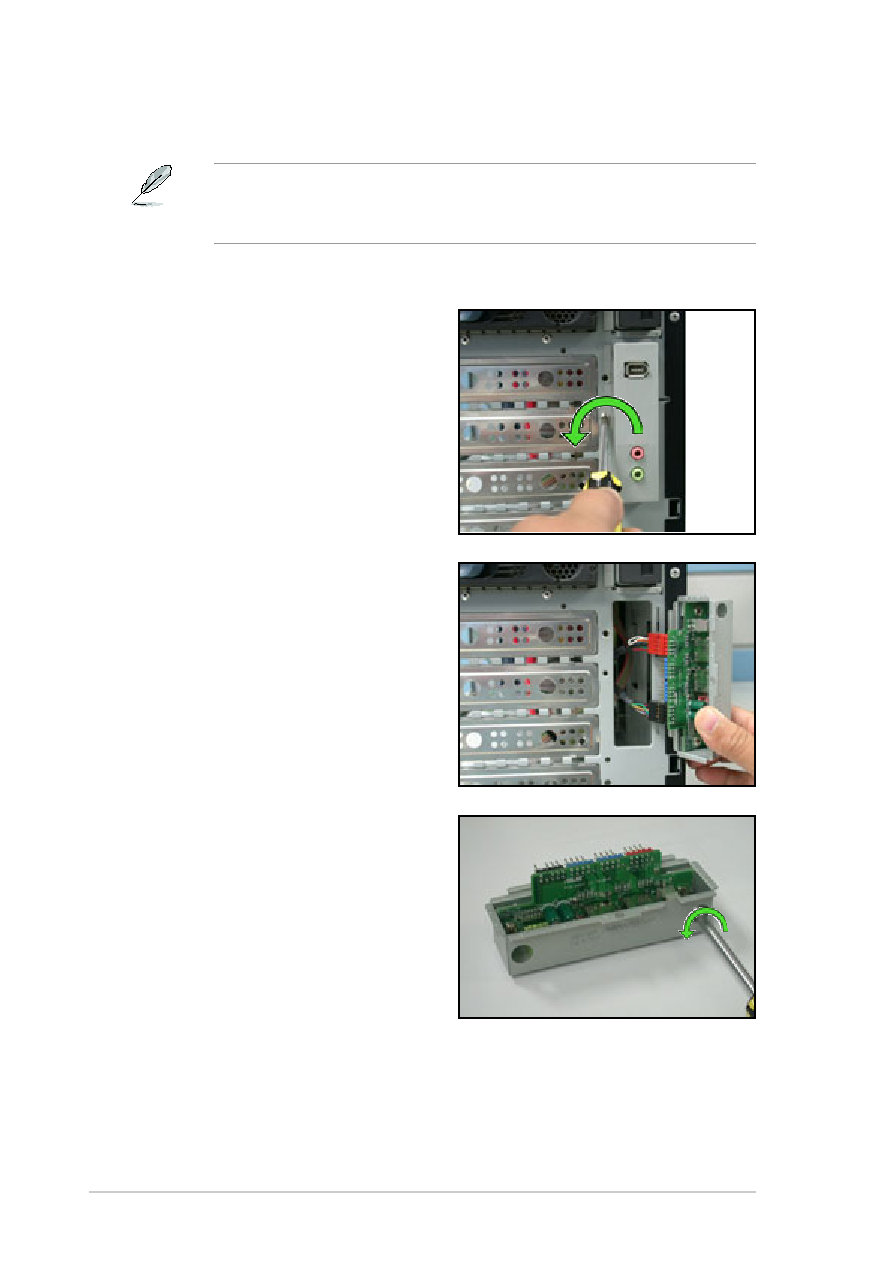
To remove the front I/O board:
1. Remove the screw that secures
the front I/O board bracket to the
front panel.
4. Remove the screw that secures
the I/O board to the bracket.
2. Carefully pull out the bracket until
you see the cables connected to
the I/O board.
3. Disconnect all the cables from
the I/O board.