ASUS High-Speed CD-ROM Drive User’s Manual
13
IV. CD-ROM DRIVE OPERATION
IV
.OPERA
TION
Front
Panel
Now that you’ve installed your CD-ROM Drive, you’re ready to start using it. To
start using your CD-ROM Drive, you need to know how to (1) operate the CD-
ROM Drive using the controls on the front panel, (2) insert CD discs into and re-
move them from the drive, and (3) handle CD discs.
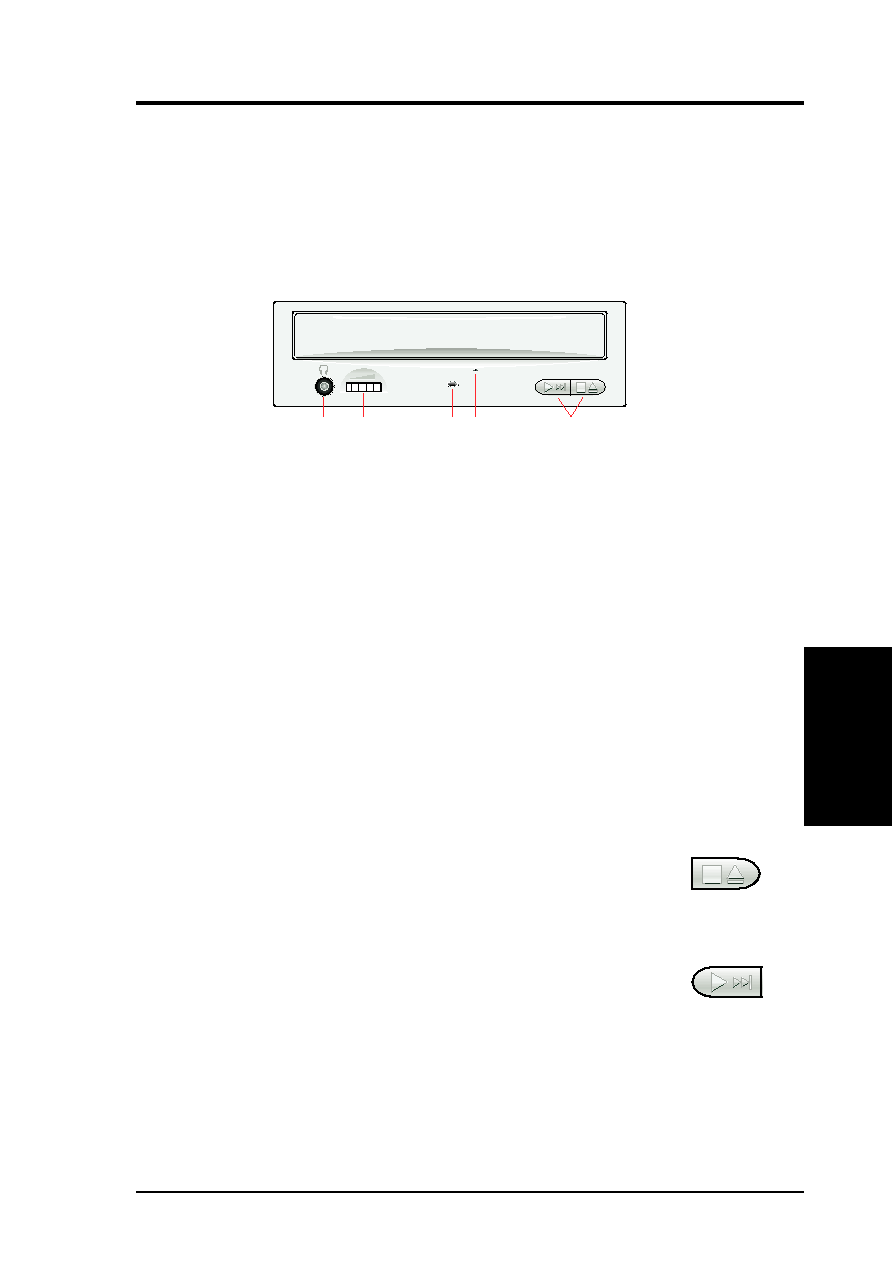
Front Panel Controls
Headphones Jack allows you to connect a pair of earphones or headphones to
the drive for private listening. It also allows you to connect a pair of powered/
self-amplified speakers. Just plug them into the Headphones Jack.
Volume Controls allows you to adjust the volume of your earphones, headphones
or powered/self-amplified speakers connected to the Headphones Jack. This con-
trol has no effect on the audio output from devices (such as speakers) connected to
your sound card.
Disc Indicator lights up when there is a disc inside your CD-ROM Drive, other-
wise this indicator will not light. This indicator flashes whenever your CD-ROM
Drive is busy reading information from your disc or when your drive is in use.
Emergency Ejection Hole allows you to manually eject the tray in case of power
failure. See Emergency Eject for more information.
Select Buttons allows you to manually control your audio discs without having
to run any software program.
Open/Close/Stop Button
The right button has three states: OPEN, CLOSE, and STOP. If tray
is closed, pressing this button will OPEN or eject it. If tray is out,
pressing this button will CLOSE it. If the drive is playing, pressing
this button will STOP CD playback.
Play/Skip Button
The left button has two states: PLAY track and SKIP track. If the drive
is idle, pressing this button will start PLAYing audio discs from the
first track on. If the drive has been PAUSEd, pressing this button will
resume CD playback or rePLAY the audio discs. If the drive is playing,
pressing this button will SKIP to the next track of an audio disc.