�
English
Device installation
To install the ASUS FrontLinker™:
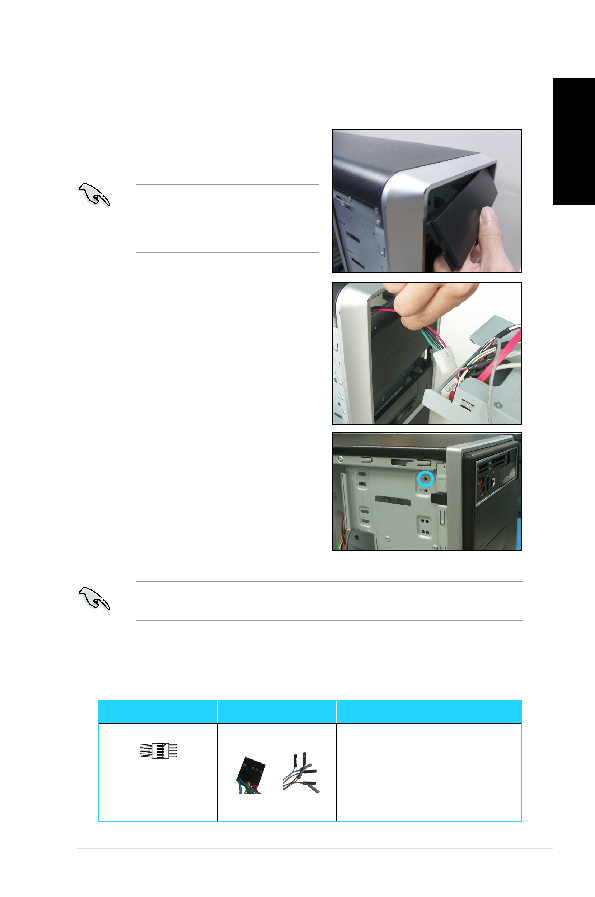
1. Remove the cover of an empty 5.25”
drive bay.
We suggest installing the
FrontLinker™ into the upper drive
bay of the PC, not under the optical
drives.
2. Plug the 4-pin ATX power cable into
the ATX power connector on the
FrontLinker™.
3. Insert the FrontLinker™ to the drive bay.
Let.all.the.cables.pass.inside.the.PC.
case. Carefully push the FrontLinker™
until its screw holes align with the holes
on the drive bay.
4. Secure the FrontLinker™ with screws on
both sides of the drive bay.
We suggest that you place your portable devices on top of the chassis while
connecting.to.the.FrontLinker™.
5. Two Front PanelAudio cables are connected to the FrontLinker™.The shorter one
should be connected with the audio cable from the chassis. For the connection
of another Front Panel Audio cable, refer to step 6.
Cable
Chassis connector
Description
.
Front Panel Audio
cable.(black.
connector) (male)
.or.
Connect the shorter cable, with
male connector, to the audio cable
from the chassis.*.
If the audio cable from the chassis
is connected to the motherboard,
unplug it first.