ASUS High-Speed DVD-ROM Drive
7
II. HARDWARE INSTALLATION
II.
Hardwar
eInstallaton
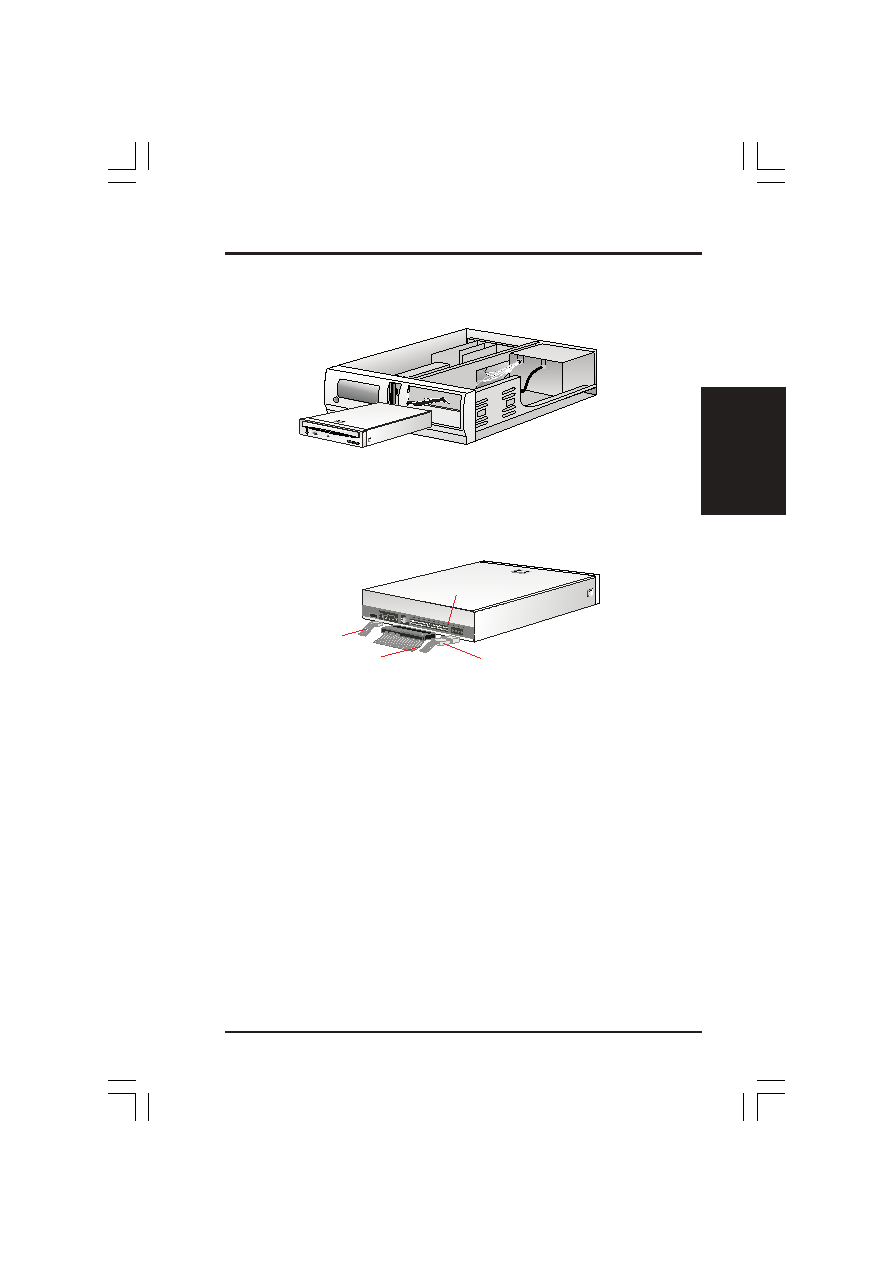
Inserting Your DVD-ROM Drive into Your Computer
Insert the DVD-ROM Drive into one of the free 5.25-inch bays available for disk drives.
NOTE: Do not slide the drive completely into the vacant drive bay. Leave some space at
the rear so that it is easier for you to connect cables to your drive.
Connecting Cables to the DVD-ROM Drive
1. Connect an unused power supply cable to the back ➀ of your DVD-ROM Drive.
2. Connect the 40-pin IDE ribbon cable to the back ➁ of your DVD-ROM Drive.
NOTE: Orient the red stripe on the cable with Pin 1 of the DVD-ROM Drive’s IDE
Interface connector.
3. If you have a sound card, connect the 4-pin CD audio cable to the DVD-ROM
Drive’s Analog Audio line out connector 4. Otherwise, proceed to the next step.
NOTE: If the pin definitions on your sound card are not the same as that (see preced-
ing section) on your DVD-ROM Drive, check with your dealer for a compatible cable.
4. If you do not have a sound card, plug earphones, headphones, or powered/self-
amplified speakers to the Headphones Jack on your DVD-ROM’s front panel (see
DVD-ROM DRIVE OPERATION). Set the volume controls of your drive and pow-
ered/self-amplified speakers to minimum before starting or restarting your com-
puter. This is to prevent possible damage to the earphones, headphones, or speakers.
NOTE: The Headphones Jack can only be used to listen to audio CD discs.
Audio Cable
Red stripe (IDE Ribbon Cable)
Power Supply Cable
Pin 1