43
Using the Notebook PC
4
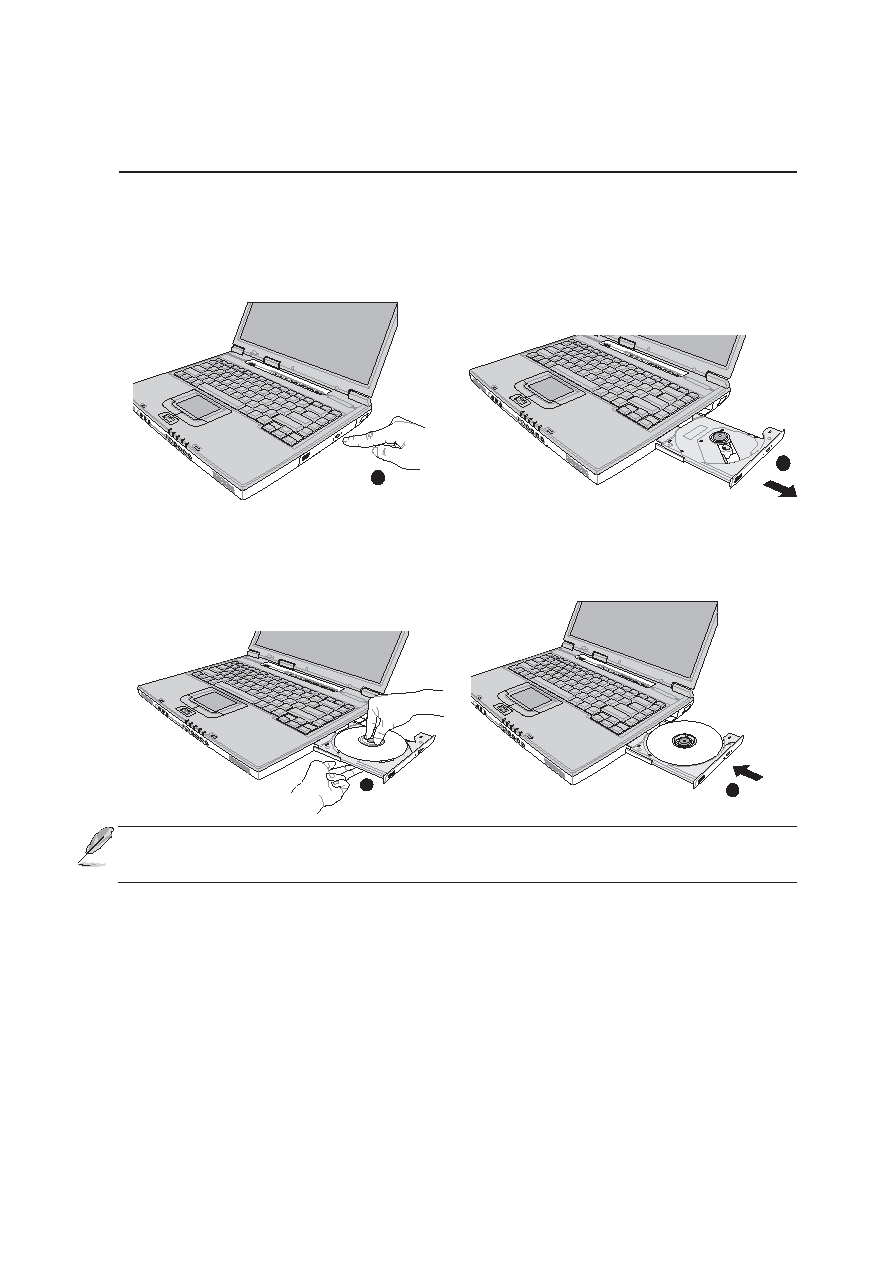
Inserting an optical disc
1. While the Notebook PC’s power is ON, press
the drive’s eject button and the tray will eject
out partially.
2. Gently pull on the drive’s front panel and slide the
tray completely out. Be careful not to touch the
CD drive lens and other mechanisms. Make sure
there are no obstructions that may get jammed un-
der the drive’s tray.
3. Hold the disc by the edge and face the disc’s
printed side up. Push down on both sides of
the disc’s center until the disc snaps onto the
hub. The hub should be higher than the
disc when correctly mounted.
4. Slowly push the drive’s tray back in. The drive
will begin reading the table of contents (TOC) on
the disc. When the drive stops, the disc is ready to
be used.
NOTE: It is normal to hear as well as feel the CD spinning with great intensity in the
CD drive while data is read.
1
2
3
4
Laser Safety
This system is classified as a Class 1 laser product. The Notebook PC’s CD/DVD-ROM drive uses a
laser reader that complies with laser product standards set by government agencies for Class 1 laser
products. It does not emit hazardous light; the beam is totally enclosed during all modes of customer
operation and maintenance.